Telephone contact
You can reach us by telephone at any time.

Virtual machines, SQL databases, storage, app services: Microsoft Azure can be used intuitively for a wide variety of applications. Below, we show you how to navigate the portal dashboard.
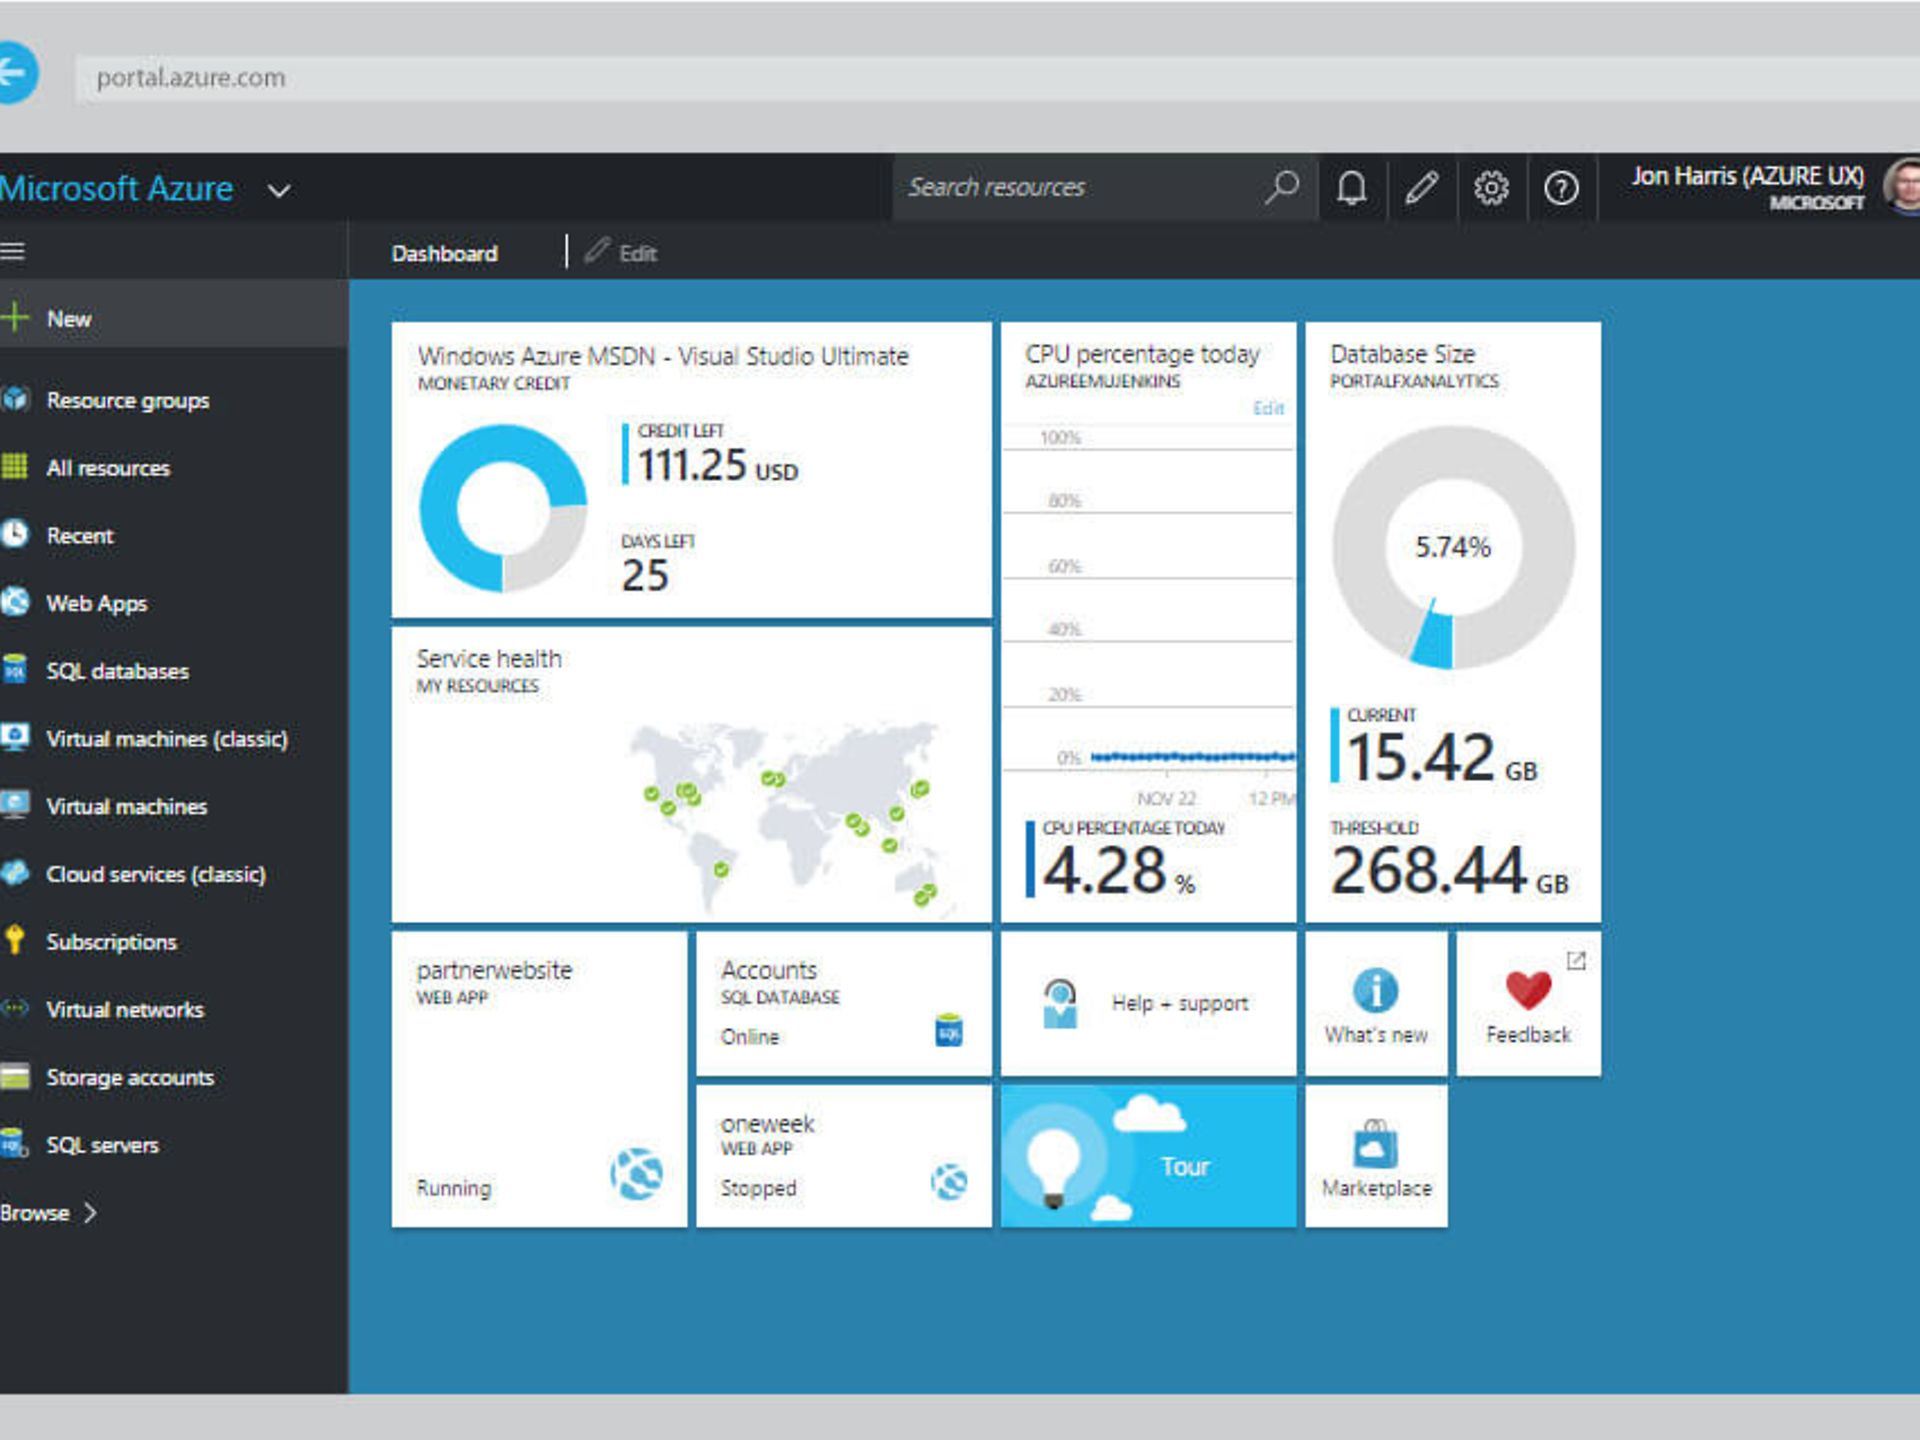
Figure 1: The Azure dashboard gives you quick access to all Microsoft Azure features.
When you book via the TelekomCLOUD Marketplace, you will receive your user access data by e-mail. Log in to the Azure Portal with this access data to go directly to the Microsoft Azure dashboard. In the top right-hand bar, you will find a range of options that make it easier for you to get started with the Azure Portal and provide relevant information at a glance. Among other things, you can use these useful elements:
A useful feature of the Azure dashboard: it can be customised! The left-hand bar shows you the services offered by Azure – initially, however, only your favourites. Click on "More services" to see all Azure services available to you. Of course, you can also search for specific services using the search bar. Select the star next to each service to add the corresponding functions to your favourites bar. These will then appear on your personalised home page by default.
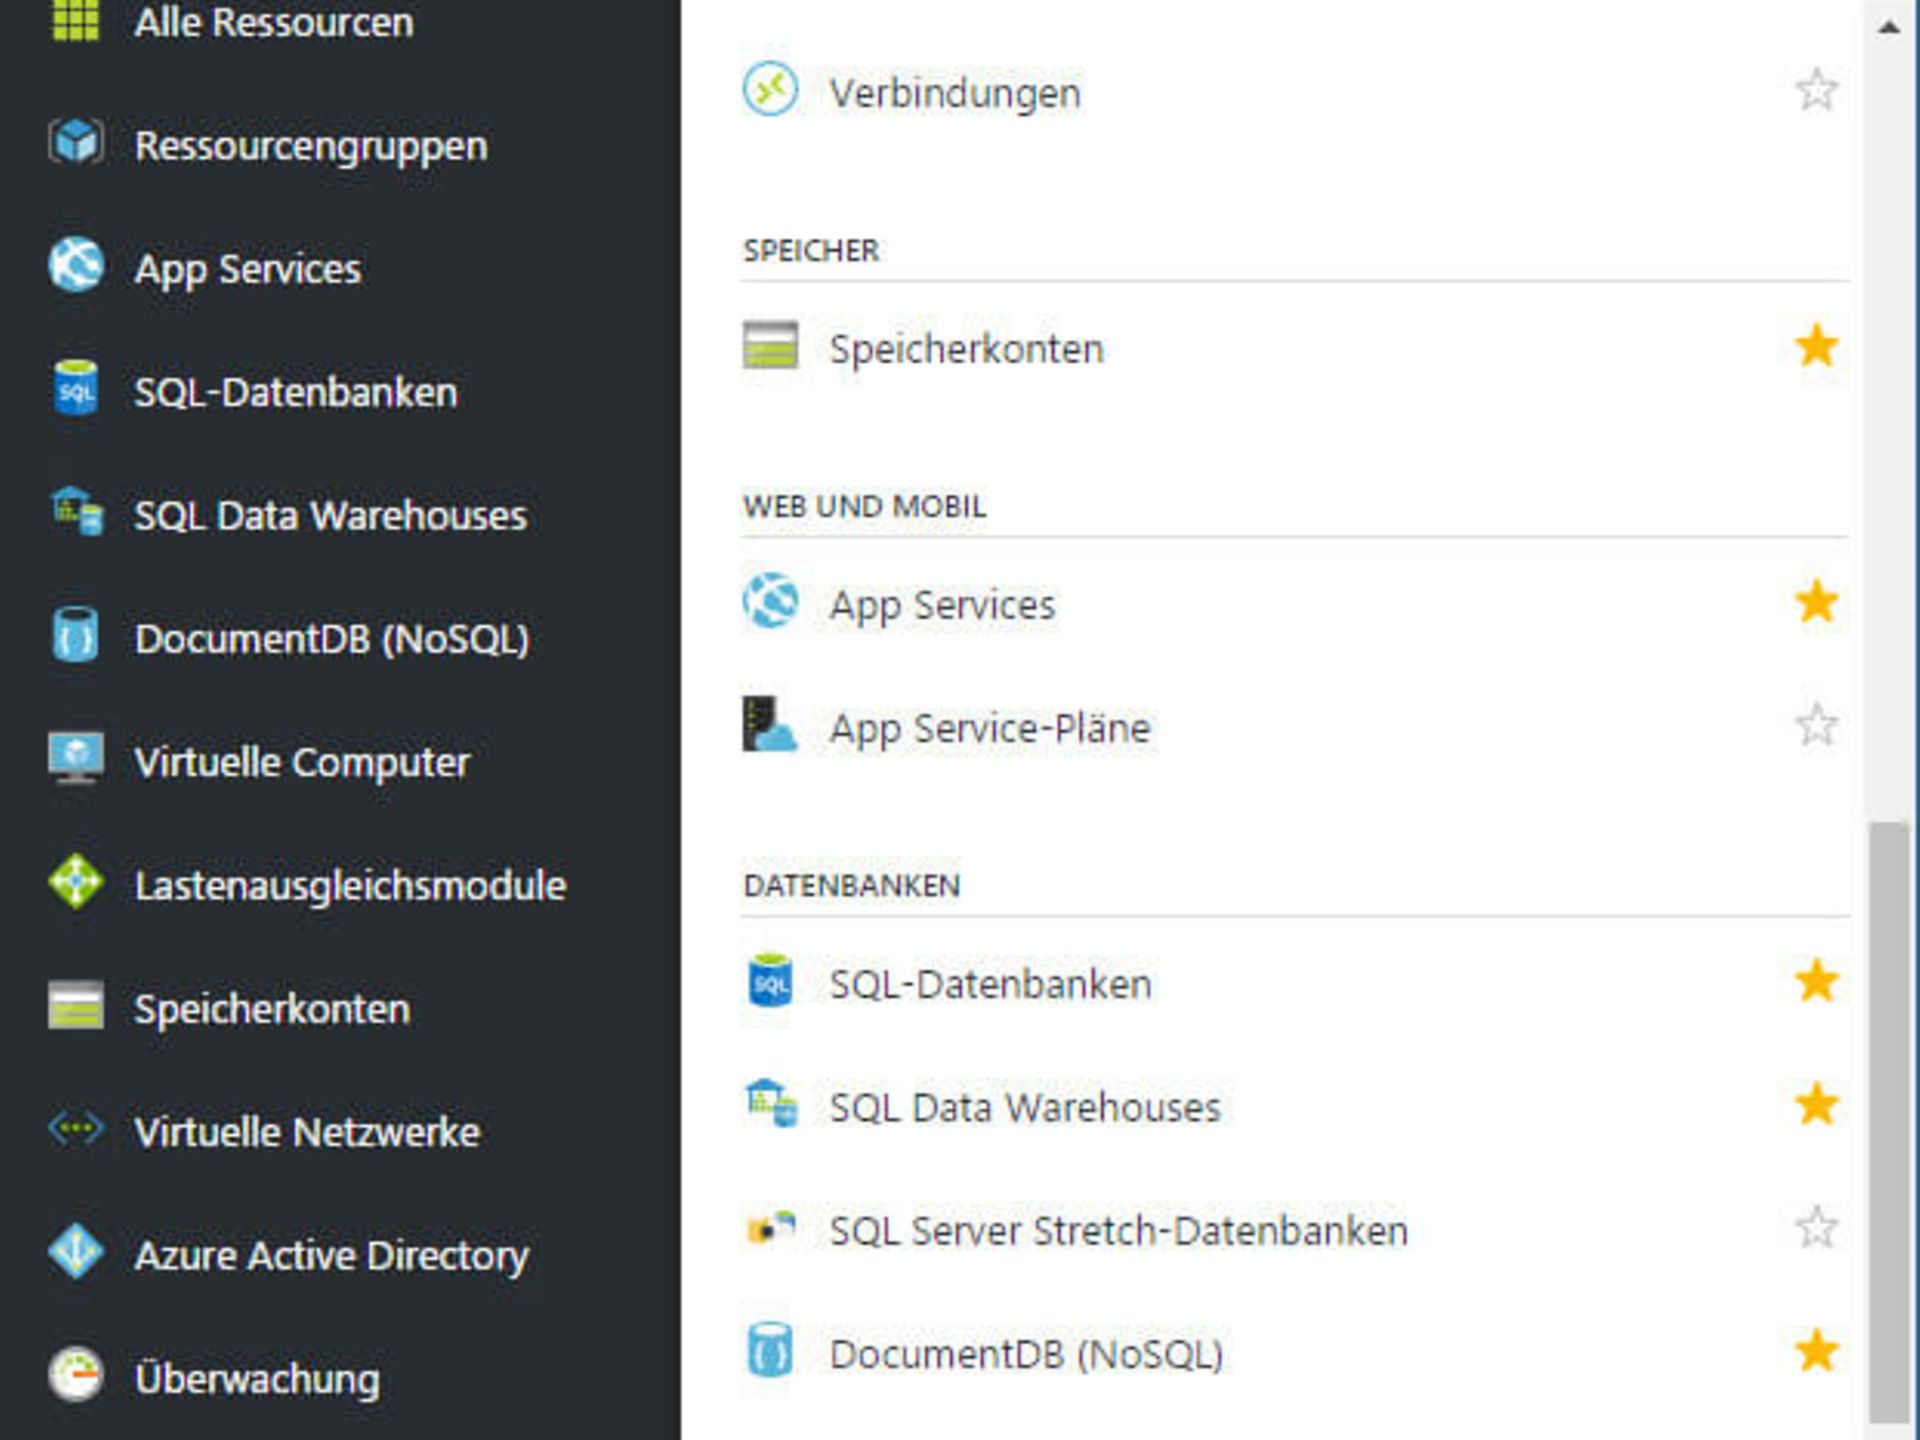
Figure 2: Use the star icon to add frequently used services to the favourites bar on the left.
Under "Edit dashboard", you will find a wide range of functions that allow you to customise your dashboard to suit your needs. For example, you can pin any graphics and animations to the dashboard. Simply click on "Pin to dashboard". You can also add corresponding graphics.
The "New Dashboard" option also allows you to configure completely new dashboards, which you can switch between as desired.
You can quickly provision new resources using the "+ New" icon. The services are sorted into different categories, such as computer or network services. The first step shows you a selection of the most important services available in the Azure Marketplace, such as Windows Server. You can also access this view by clicking on the "Marketplace" tile in the dashboard.
In this comprehensive marketplace view, you can not only access Microsoft's own resources, but also find many ready-made templates from different manufacturers, which in most cases you can deploy in a Bring Your Own Licence (BYOL) model. You have the option of searching by category or by specific applications.
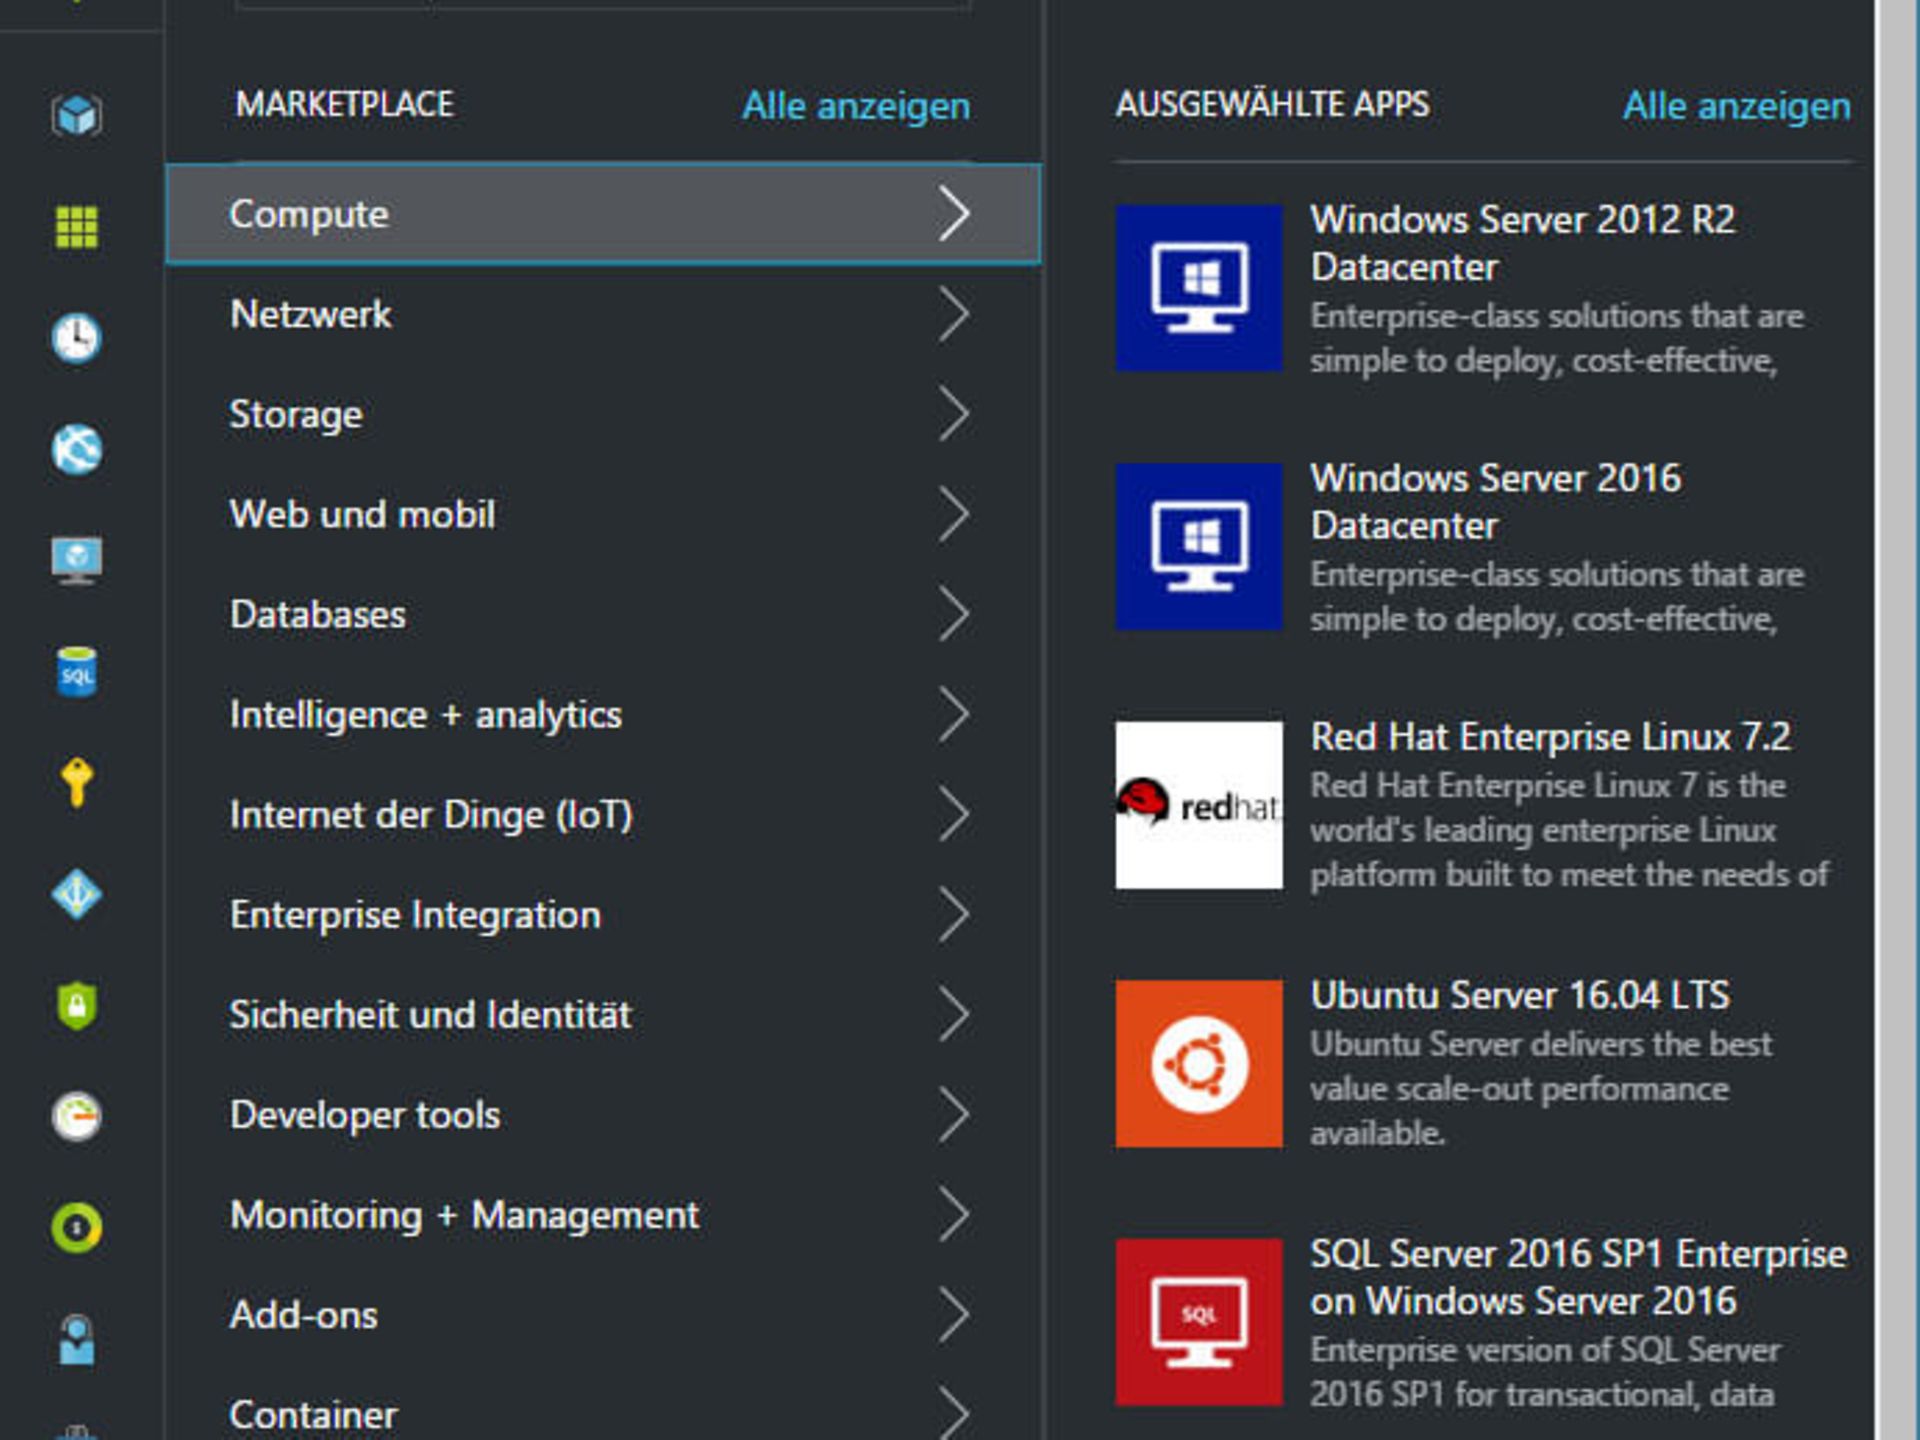
Figure 3: You can quickly provision new resources using the "+ New" icon.
Another practical feature is the option to create resource groups. This allows you to combine different resources that are needed for the same purpose, for example to run an application, or that are intended for a specific department, into one group. This makes monitoring and assigning access permissions easier. Behind this practical functionality is the Azure Resource Manager (ARM), which allows you to manage resources in these logical containers.
Here's how to create a resource group:
In the left-hand bar, click on 'Resource group' and then 'Add'.
Select the desired service via "+NEW" and specify a new resource group to which the service should be assigned during configuration. You can
get an overview of all resource groups via the link in your left-hand bar "Resource groups". Here you can also select individual resource groups and pin them to your dashboard.
The "All Resources" item above it, on the other hand, shows you a complete list of resources available for an existing subscription.
Clear navigation within the resource group makes it easier for you to find your way around. For resource groups with many assigned services, it is worth using the integrated search function for navigation.
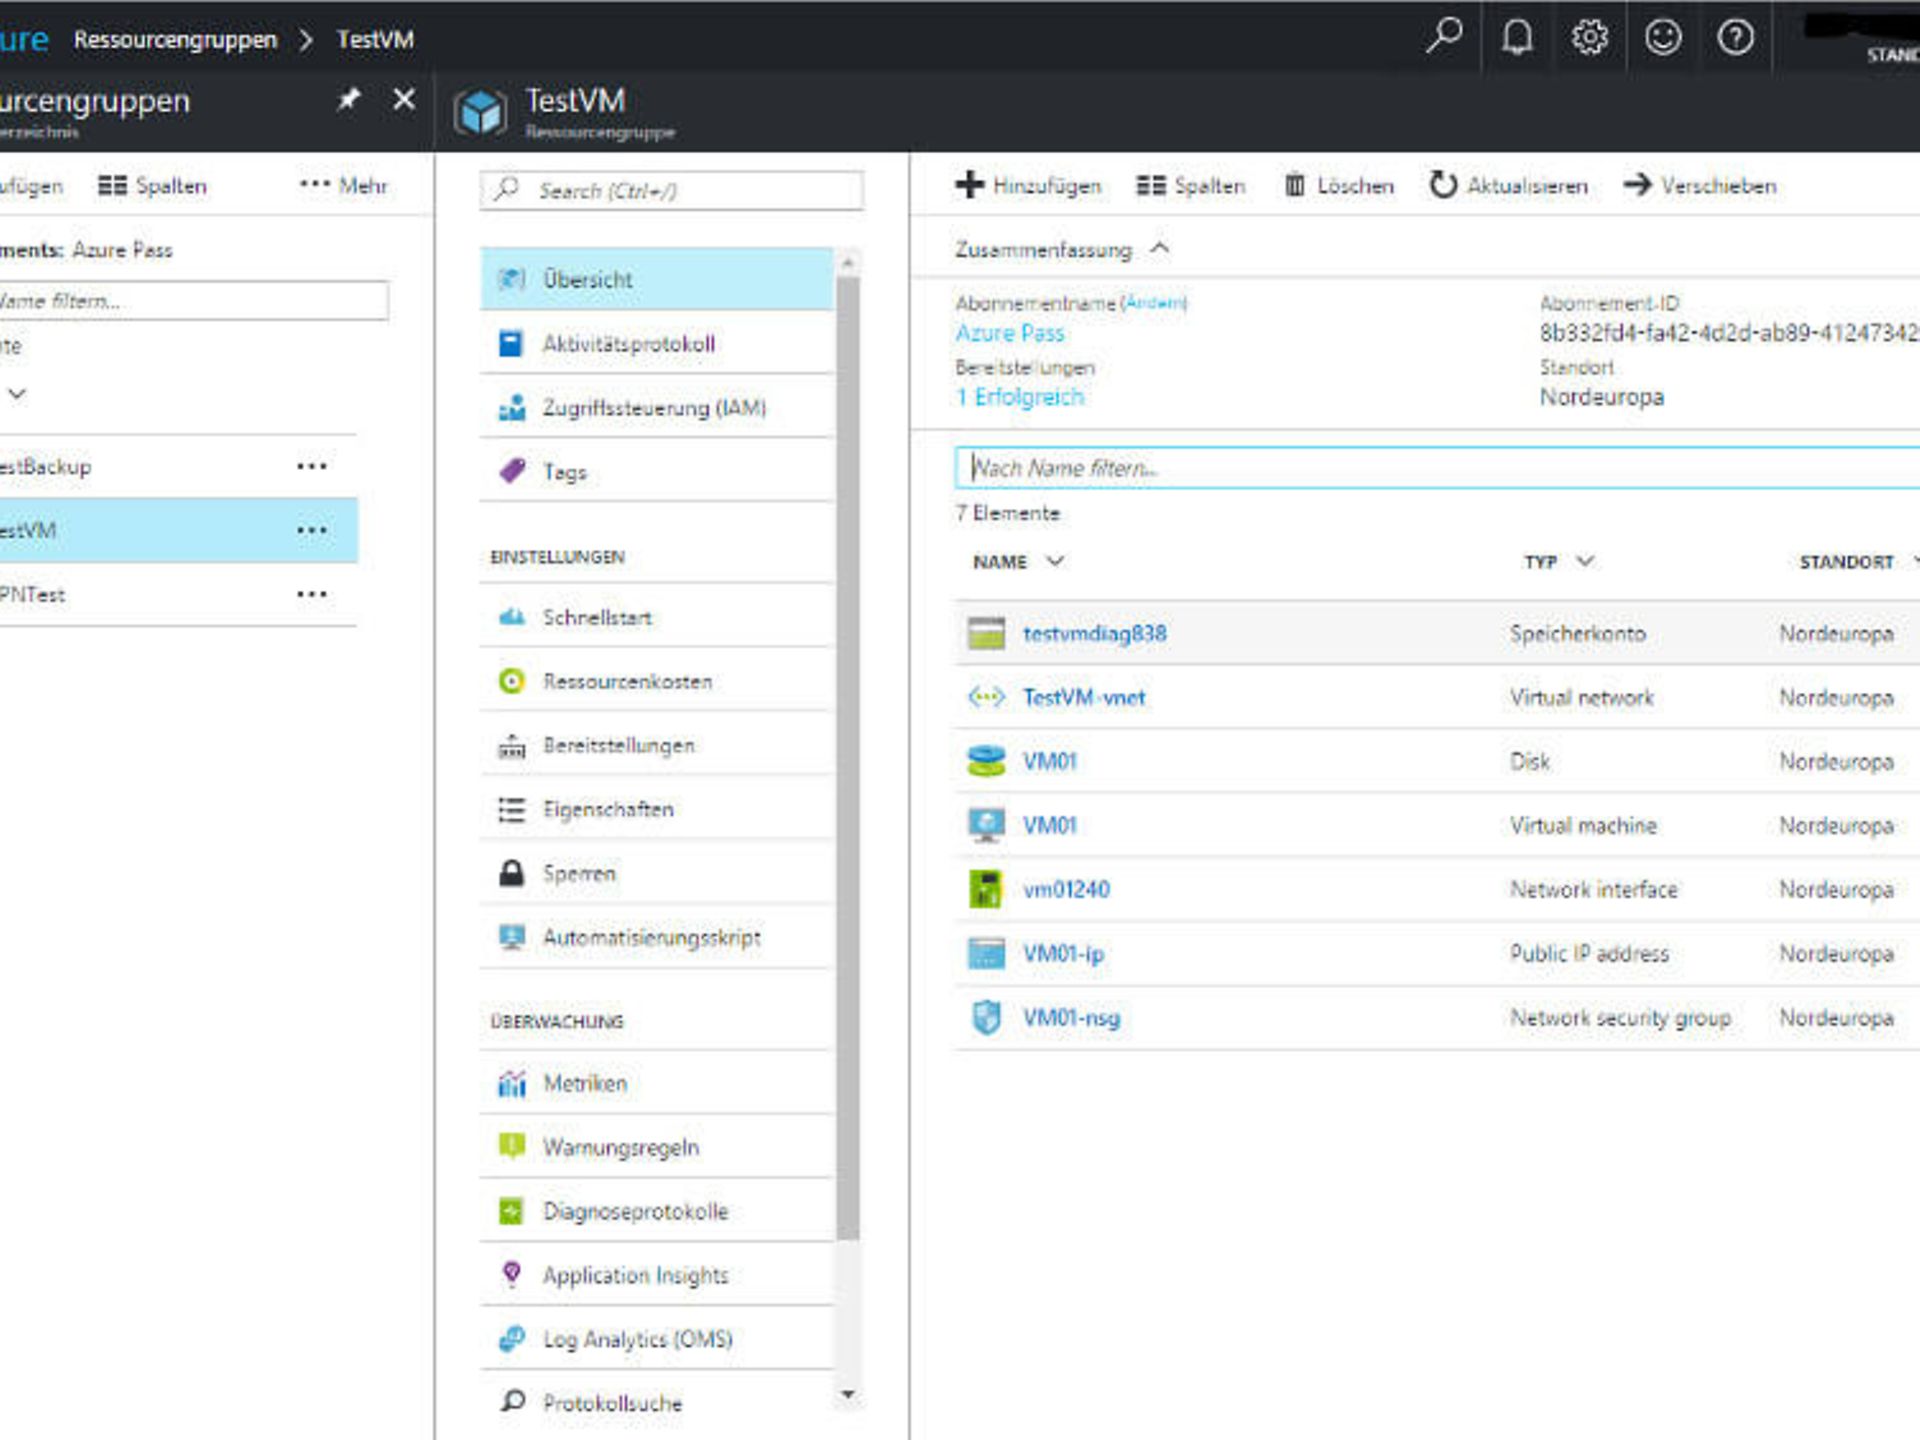
Figure 4: Services can be grouped together in logical containers using the resource group.
Practical: Whether app services, SQL databases or virtual machines, a wide variety of resources have the same management options, including overview, activity log, access control, settings and monitoring. As a result, once you have learned how to manage one resource, you will also be able to handle other resources.
With Microsoft Azure, you can set up a virtual machine in just a few minutes. Below is a quick guide to creating a virtual machine:
1. Select the "Virtual machines" option in the dashboard (left bar).
2. In the window that appears, click on "Add" to create a new virtual machine – either a Windows Server or a Linux Virtual Machine. A list of various ready-made solutions will appear. Click on the desired solution – for example, Windows Server 2016 – and then select the "Create" option.
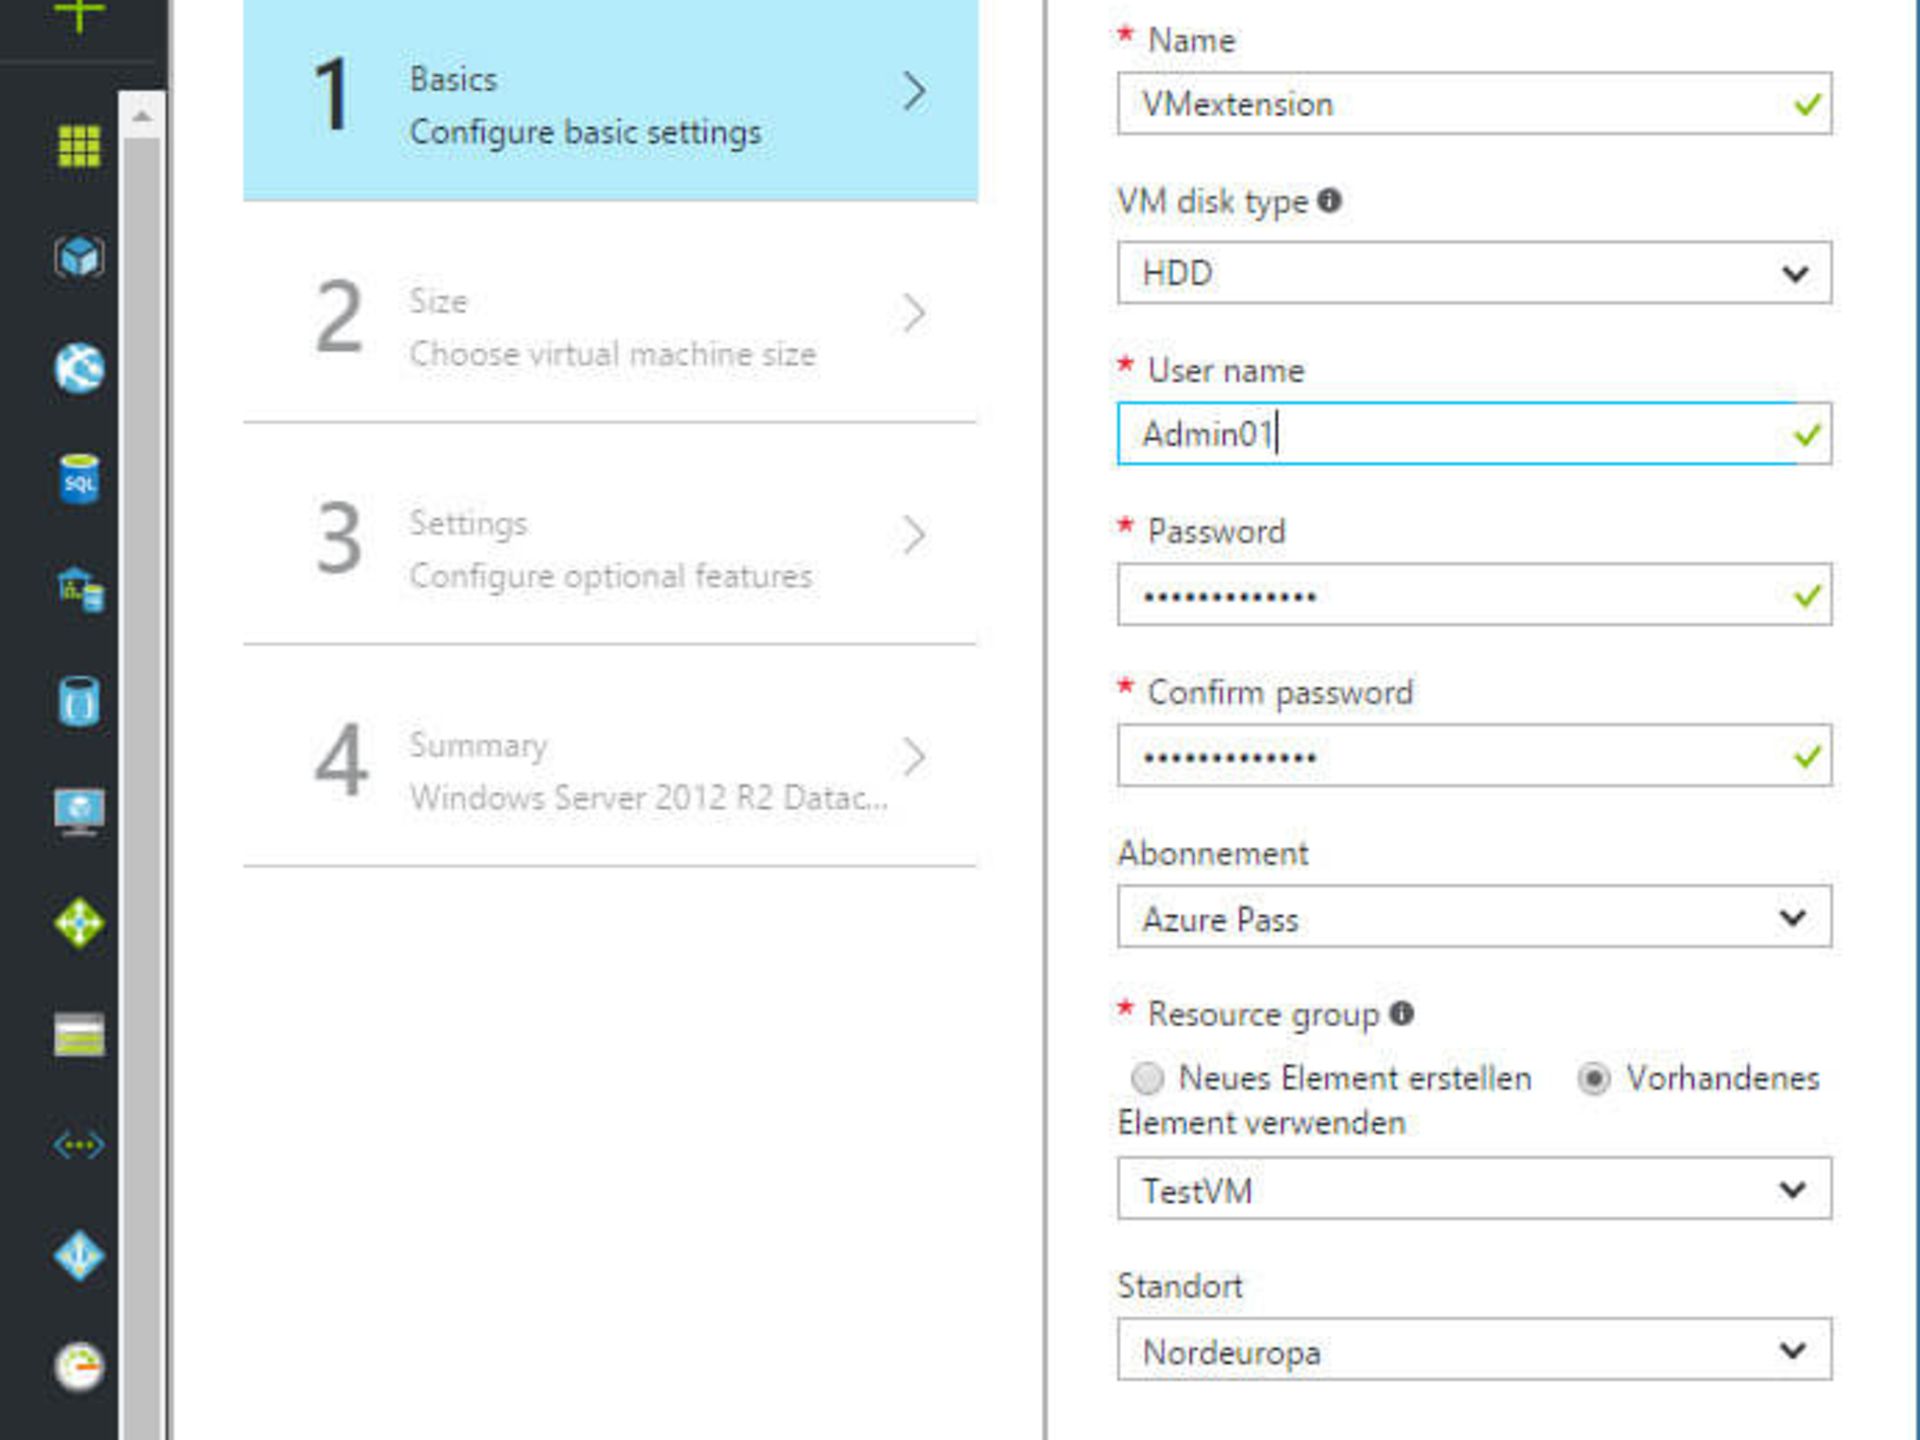
3. Now the configuration of your machine begins: In the first step, enter a name for your virtual machine, specify the desired disk type (SSD or HDD), set a user name and password, and select a resource group to which this service should be assigned.
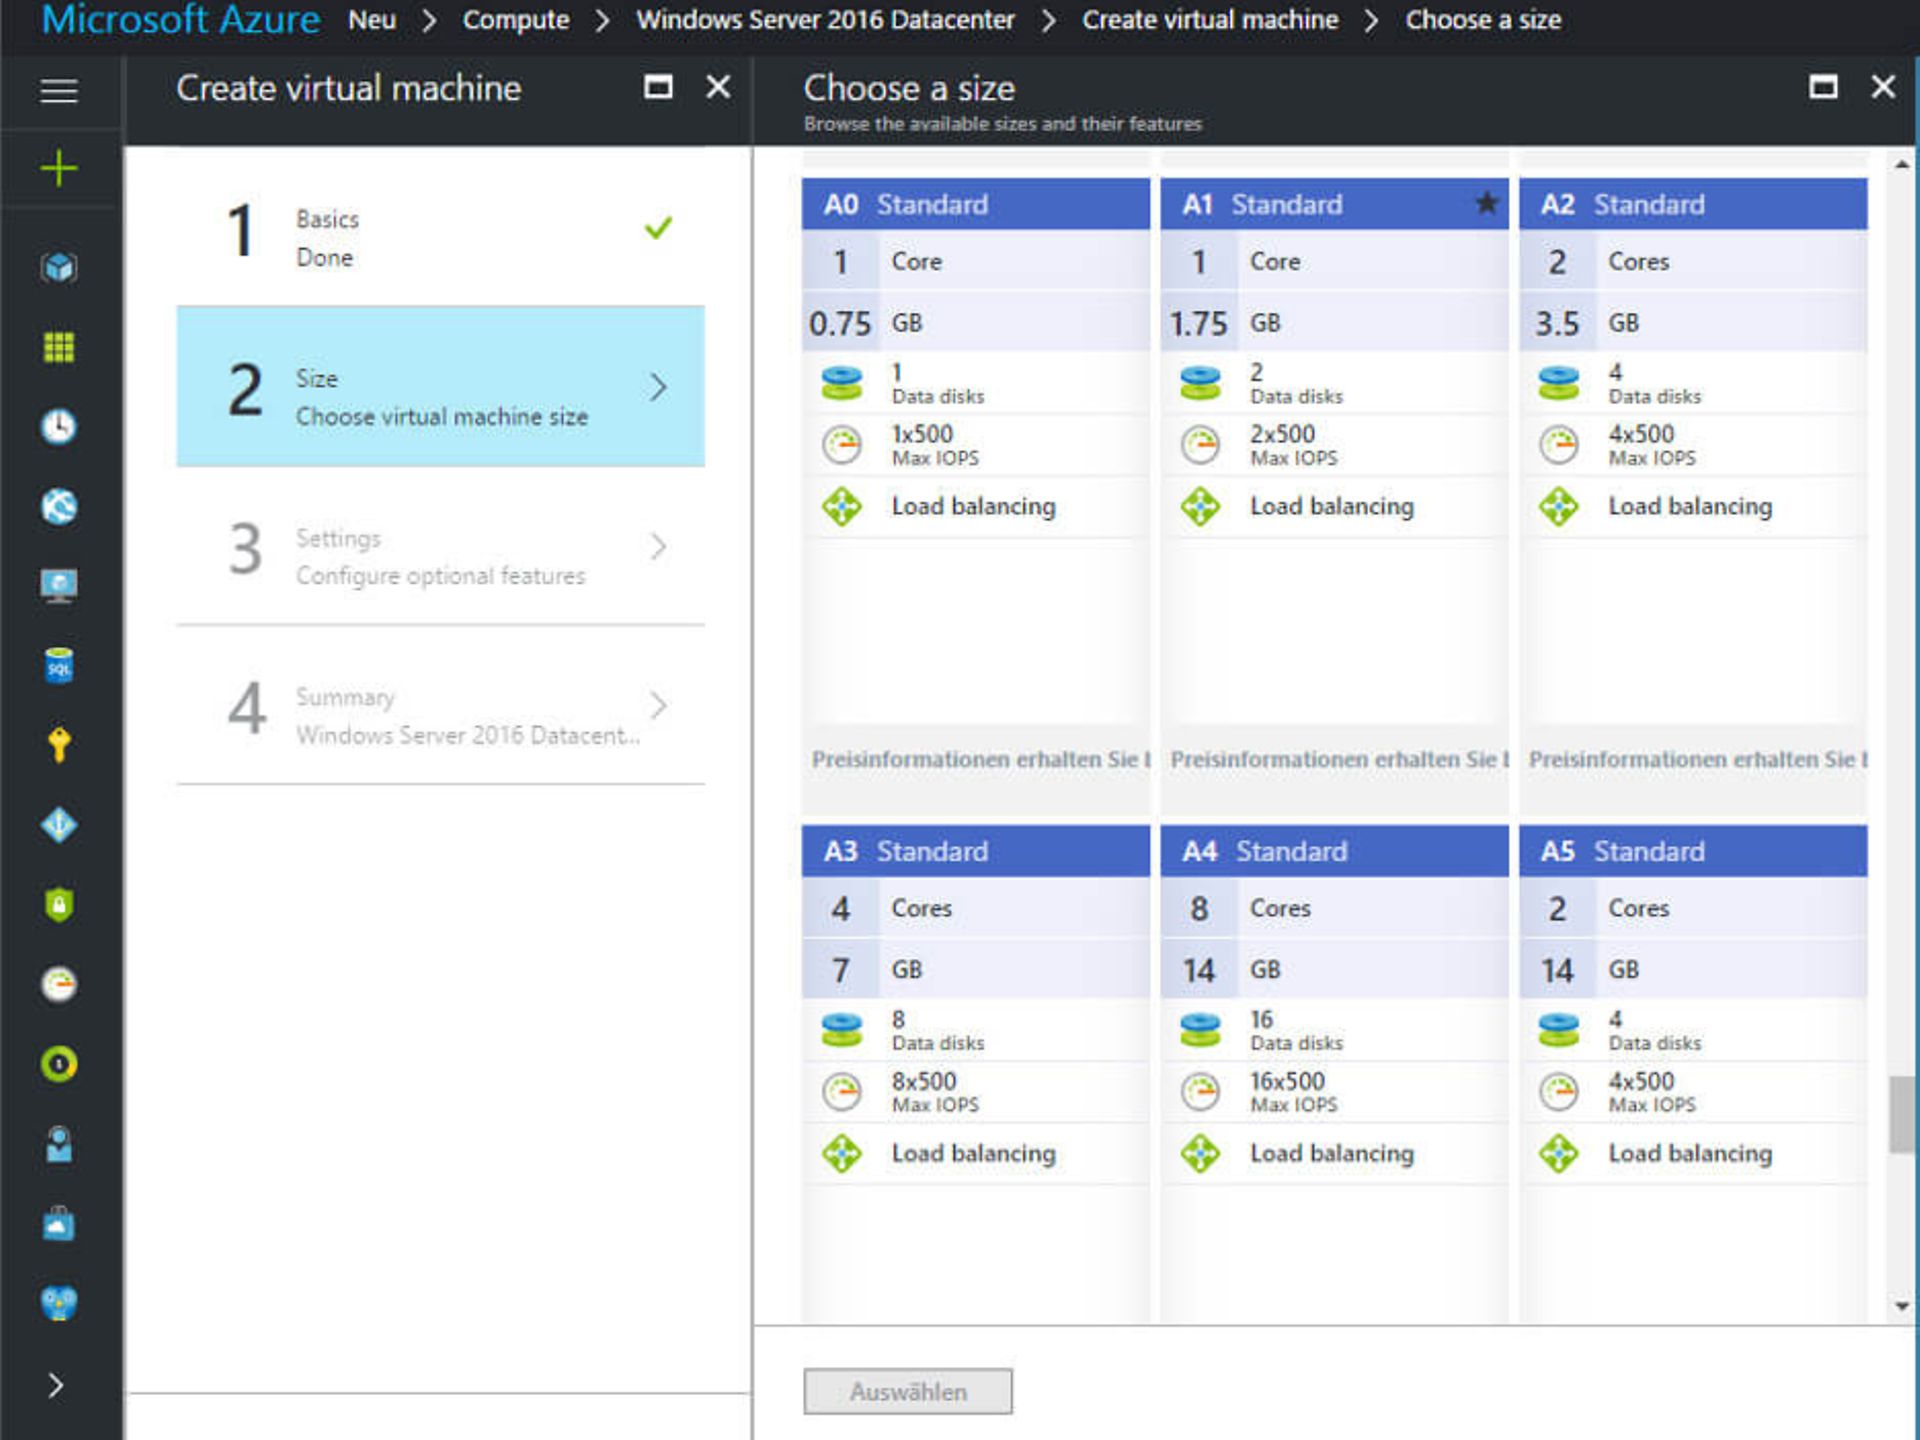
4. Now decide on the size of your virtual machine. Initially, you will only see an overview of the sizes recommended by Azure. Clicking on "Show all" will open a comprehensive selection.
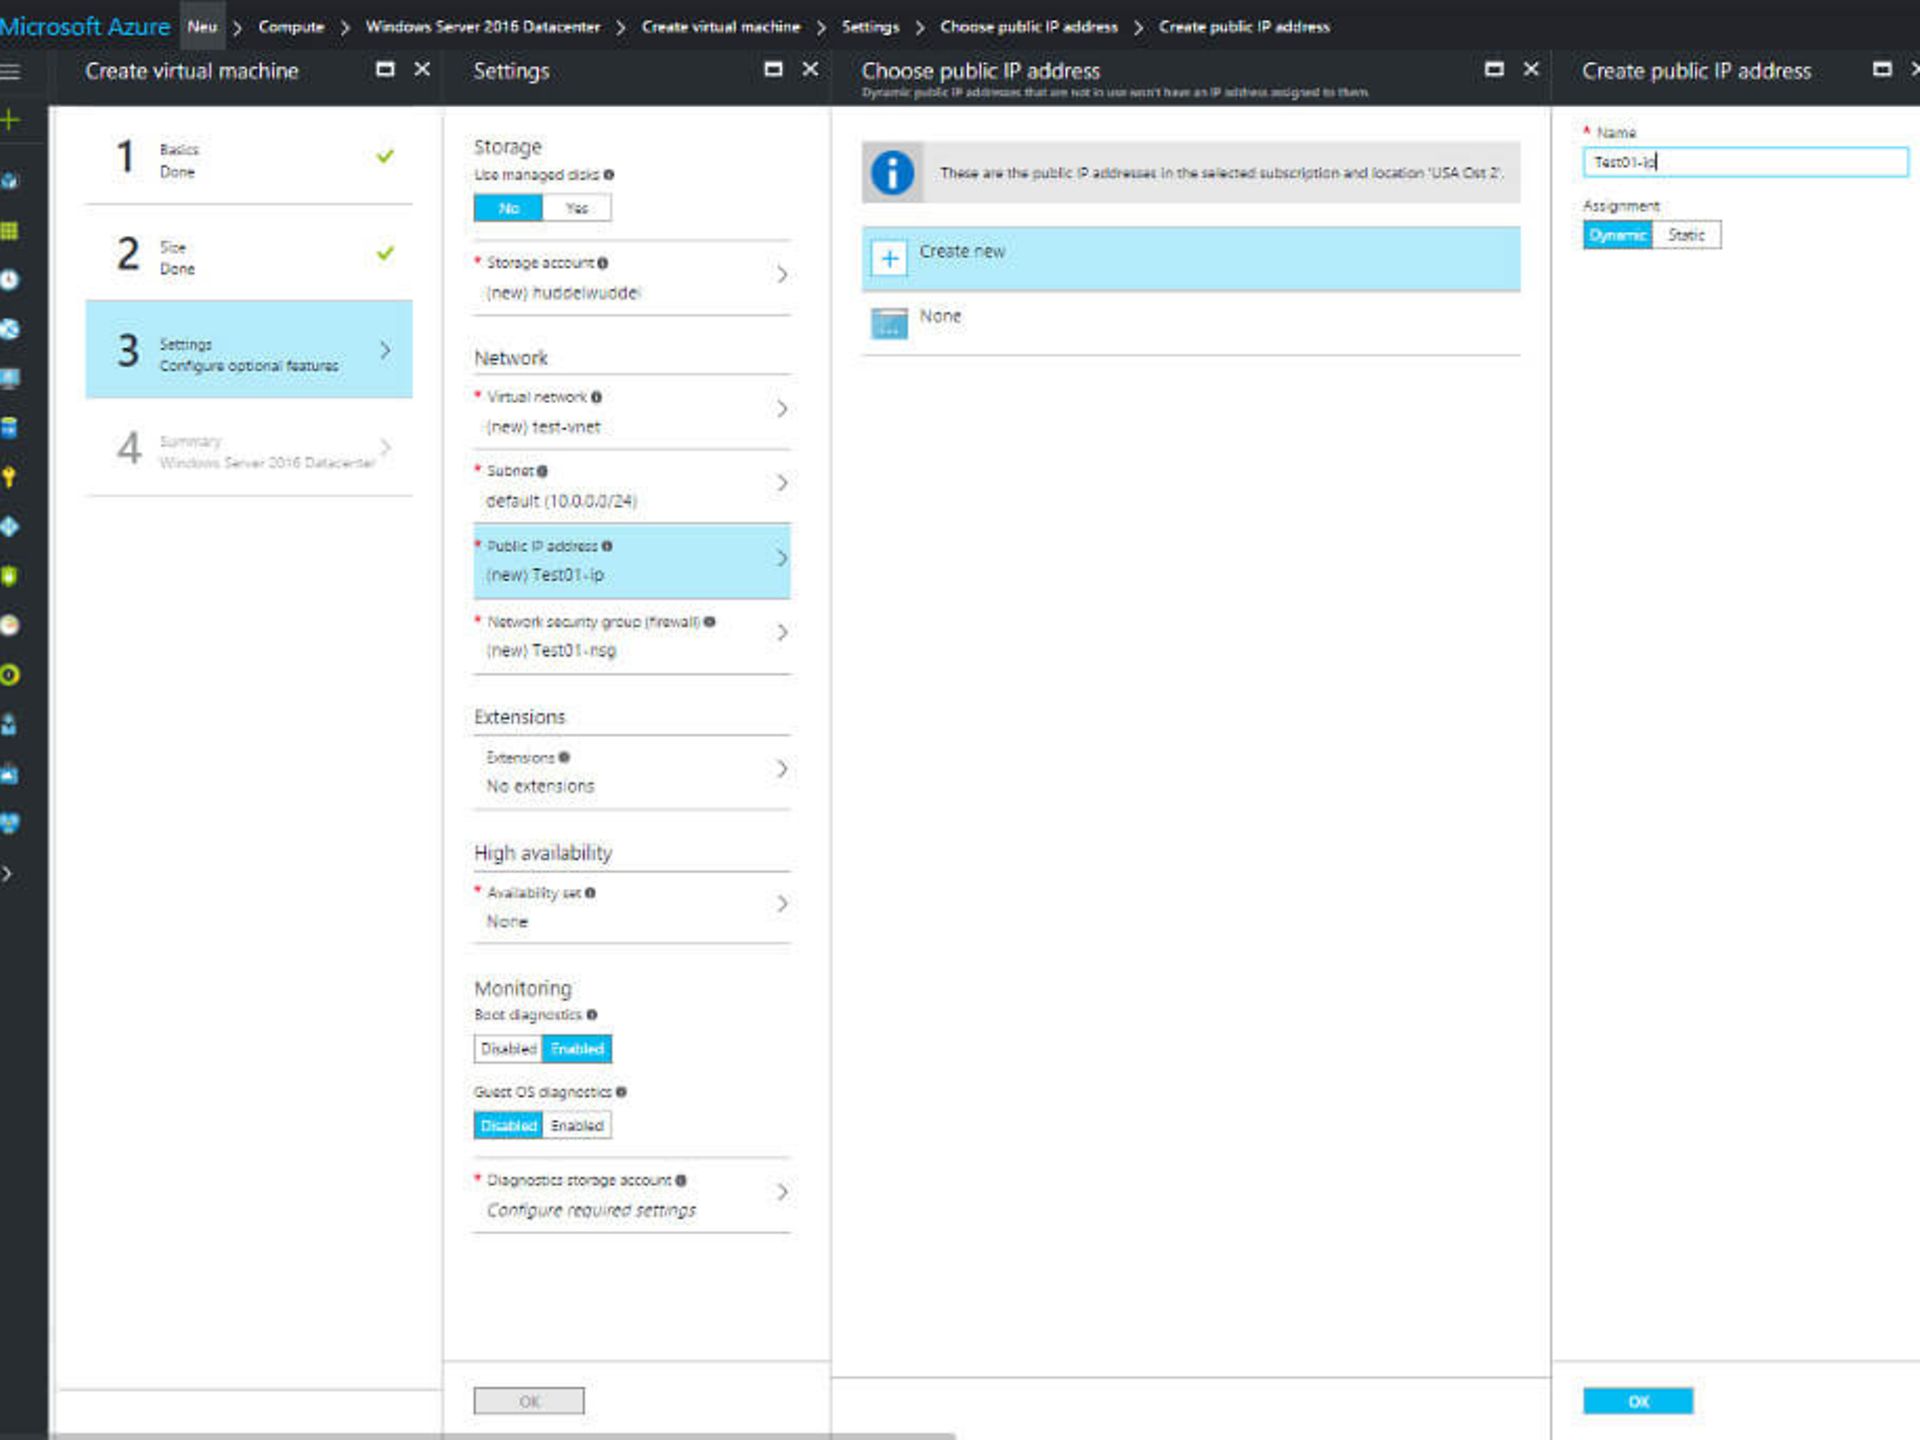
5. Next, specify additional settings for your virtual machine. Among other things, you will create a storage account for your virtual machine and specify the performance level and redundancy option to be used for the storage. Read more about the available storage options here.
6. Clicking "OK" summarises the properties of the machine to be created. If all the information is correct, click "OK" again to complete the creation process. Useful feature: At this point, you also have the option of downloading a template with all the parameters of your configuration. You can then use this to provision additional machines with the same configuration more quickly.
You can set up your new virtual machine in just a few minutes. You can check the creation status at any time on the dashboard or in the notification menu. Once the virtual machine has been created, a navigation menu will open automatically, allowing you to manage the virtual machine.
Using Microsoft Visual Studio (or directly in the Azure Portal), you can create a web app in minutes and use it with Azure. To do this, follow these steps.
1. Open Microsoft Visual Studio.
2. Click on "New Project" in the left-hand bar to start creating an ASP.NET web app.
3. In Solution Explorer (top right-hand corner), right-click on the web app you have created and select the "Publish" option. 4
. In the window that appears, click on the "Microsoft Azure App Service" option.
5. Select your subscription.
6. Enter a name for the new web app, select additional Azure resources that your app requires under "Services", and then click on "Create". You can now also view the web app you have created in the Azure portal.
7. Click on "Publish" in Visual Studio to install your new web app in Azure, where you can manage it.
Within Azure, you now have the option to manage your ASP.NET web application according to your preferences.
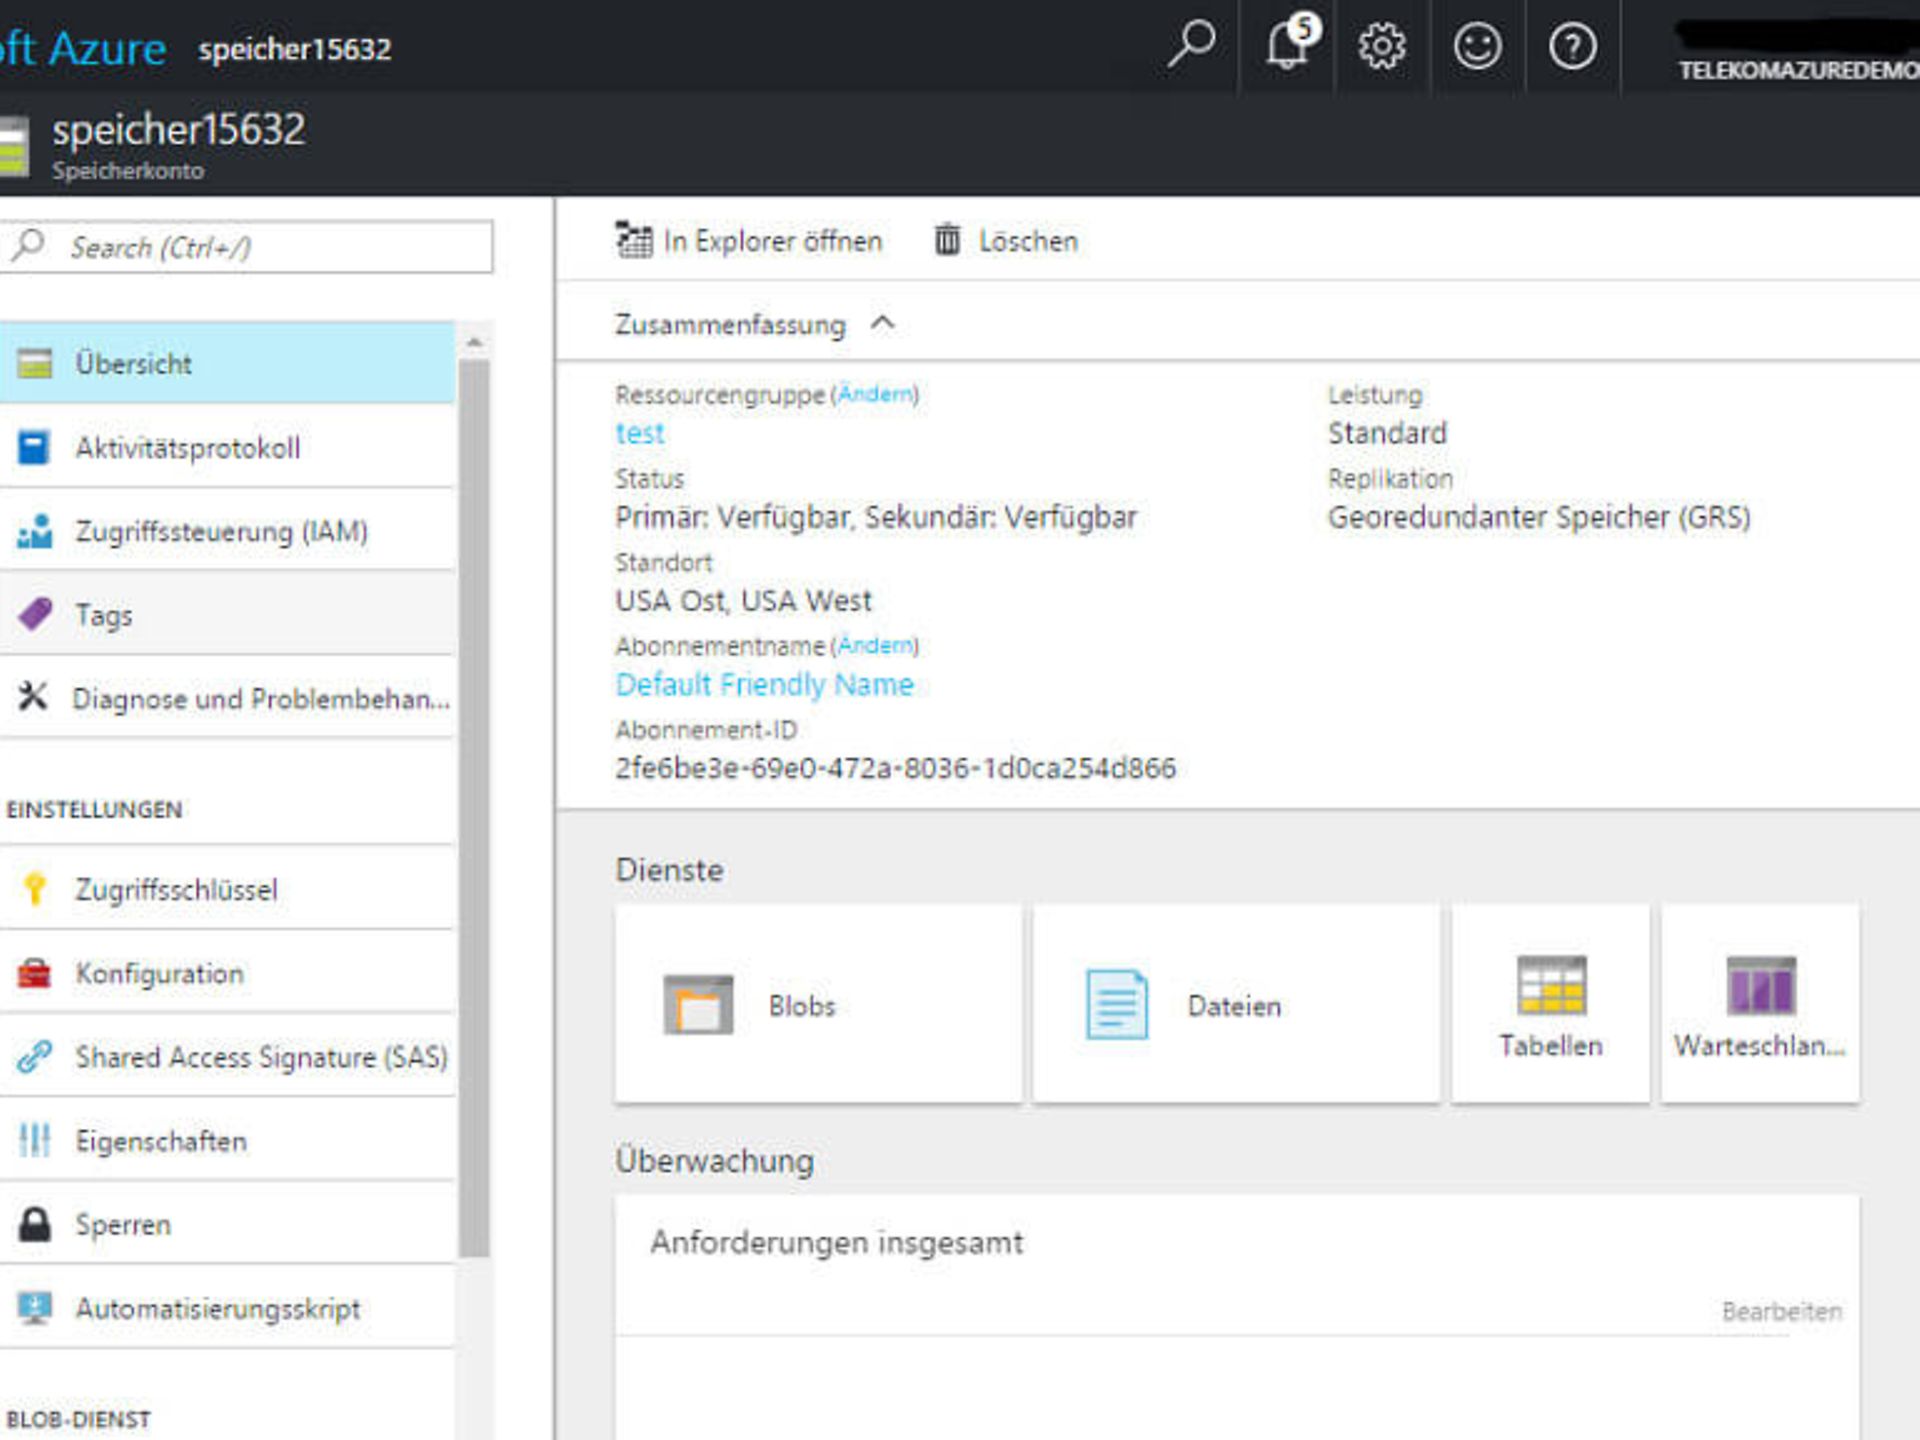
In Azure Storage, you can use any of the storage types: files, blobs, queues, and tables (more information about the properties of the storage types can be found here). To do this, proceed as follows.
1. Click on "+New", "Storage" and then "Storage Account" to create a new storage account.
2. Give your storage account a unique name and configure the desired settings.
3. Finally, click on "Create" to complete the creation of your new storage account. Tip: Tick the "Pin to dashboard" box to view your storage account directly from your dashboard.
You can now use the services listed in your new storage account as you wish.
You can create an SQL database in just a few steps using the Azure portal. We provide you with step-by-step instructions.
1. Click "+New" in the dashboard, select "Databases" in the Marketplace, and click "SQL Database" under "Selected Apps". 2
. Depending on your requirements, you can choose from different sizes. Performance can be scaled later as desired.

Figure 9: If desired, you can easily migrate an existing SQL database to Azure.
3. Fill in the requested information and specify whether you want to populate the database with existing data or create a completely empty database. Under "Select source", you can select a backup that you have previously uploaded to Azure, allowing you to easily migrate an existing database to Azure.
4. Click on "Create" to create the SQL database.
5. Under "Notifications" – at the top right of the menu bar – you can then view the creation progress of your SQL database.
Once you have successfully created the SQL database, you can manage it in the dashboard. Among other things, you now have the option of scaling your database depending on the required performance and protecting it by choosing various security measures.
Are you interested in our products? Contact us on our free expert hotline 0800 33 04444!
You can reach us by telephone at any time.
To send us an email, simply use our contact forms.
The chat service is available Monday to Friday from 8 a.m. to 8 p.m.
Our AI-based chatbot answers your questions 24/7.