Telephone contact
You can reach us by telephone at any time.
Guide: Microsoft 365 and Office 365 for administrators – 11 first steps after booking.

Microsoft 365 and Office 365 offer businesses of all sizes a scalable and powerful cloud-based productivity solution. From the basic version with email, calendar and word processing to the comprehensive Office package, which includes applications such as SharePoint, video conferencing and all the familiar Office programmes, everything is included. To make it as easy as possible for you to get started after booking a Microsoft 365 package, we have summarised the most important steps and instructions for you on this page:
When you sign up for Microsoft 365, a domain in the format mycompany.onmicrosoft.de is automatically created for you. You select this onmicrosoft domain during the sign-up process in the Telekom Cloud Marketplace. You can enter your company name or an alternative domain of your choice in the corresponding field.
With manual configuration, you will receive a free domain in the style of mycompany.onmicrosoft.de and Microsoft 365 access with a freely selectable ID in the style of Max.Mustermann@meinefirma.onmicrosoft.de. With automatic configuration, the email address is created from a combination of the company name and other details. Please note that this domain cannot be renamed later!
It may happen that the desired .onmicrosoft.com or onmicrosoft.de domain is already taken. In this case, you will need to choose an alternative domain. However, you have the option of subsequently integrating your own company domain into the Microsoft 365 Admin Centre and using it for your email addresses.
Further information on this topic can be found in section 5 of this blog post or on our help page "Add your own domain".
During the booking process, you can enter an email address to which your login details will be sent so that you can log in for the first time. You can then change the password to one of your choice. Log out and log back in with the new password to manage your package, add further domains or configure the Microsoft 365 services.
Important: The first Microsoft 365 user you create is also your first administrator. This means that they are automatically assigned a licence to use Office services and can use their administrator rights to manage the various services. As an administrator, you can create new users with administrator rights at any time or assign additional permissions to existing users.
The difference between admin and user accounts is described in detail in this FAQ.
You purchased your Microsoft 365 or Office 365 licences in the Telekom Cloud Marketplace. Now you need to assign these licences to users. You can set up user accounts directly in CentreMicrosoft 365 Admin Centre
During the creation process, you can immediately assign the desired licence to the respective users.
To do this, click on "Users and Groups" in the Microsoft 365 admin console. The view will change so that you can add new users and assign licences. Click on the "plus" symbol to add a new user and assign them the appropriate licence.

Please assign a user name for this user and then assign the licences for the individual services under 'Product licences'.
In the next step, you can specify the email address to which the new login details should be sent.
When creating a user, you can choose to require them to set a new password when they log in for the first time. The user will then have access to the services assigned by the Microsoft 365 administrator, such as Outlook, OneDrive, or Microsoft Teams, provided that the respective Microsoft or Office 365 plan includes these services.
To rename an existing user in your Microsoft 365 or Office 365 package, log in with your admin ID. Select the desired user from the "Active Users" menu and click on "Manage User Name". Here you can change the user name. In addition, the user menu allows you to manage email aliases, assign roles and customise contact information, including the display name.
You can use an existing domain for your Microsoft products. You can find the relevant settings in the Microsoft 365 Admin Centre under the 'Setup' menu item in the 'Sign-in and security' section under 'Set up your custom domain'. The integrated wizard guides you through the individual steps and even supports you with a video tutorial. The DNS settings can be changed with your provider.
Here you will find step-by-step instructions for adding your own domain.
To switch users in Microsoft 365 to your domain, first go to user management. Select the relevant user and click on 'Manage user name'. Here, you can not only change the user name, but also select the domain using the drop-down menu behind the '@' sign.
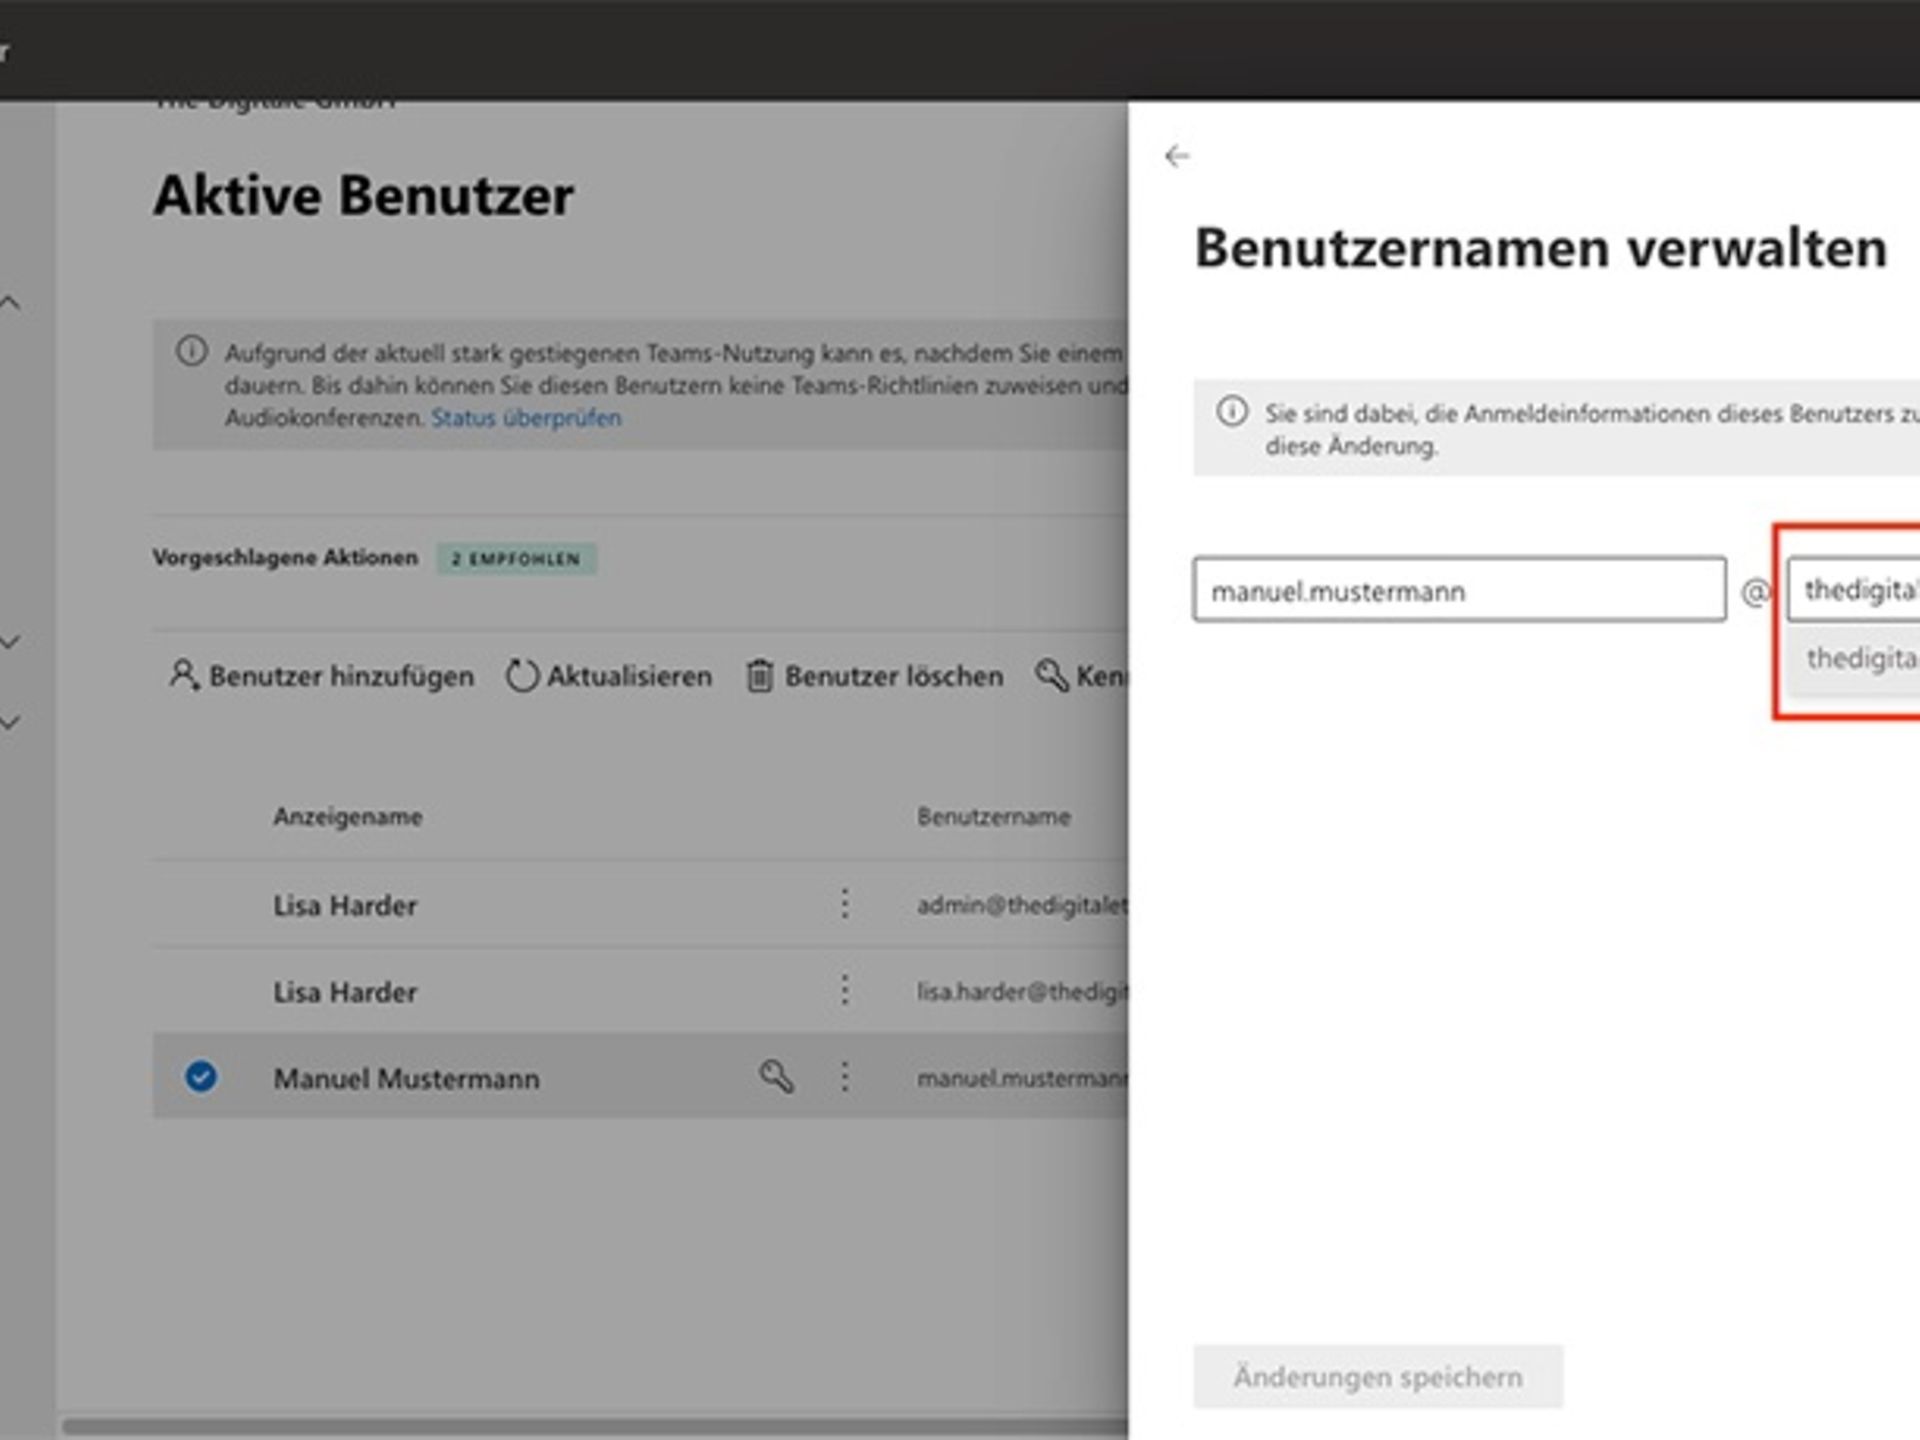
Then change the user name from ".onmicrosoft.com" or ".onmicrosoft.de" to your own domain. Once you save this setting, the user's default email address and login name will be changed to this user name. You can also change multiple users to the desired domain at the same time.
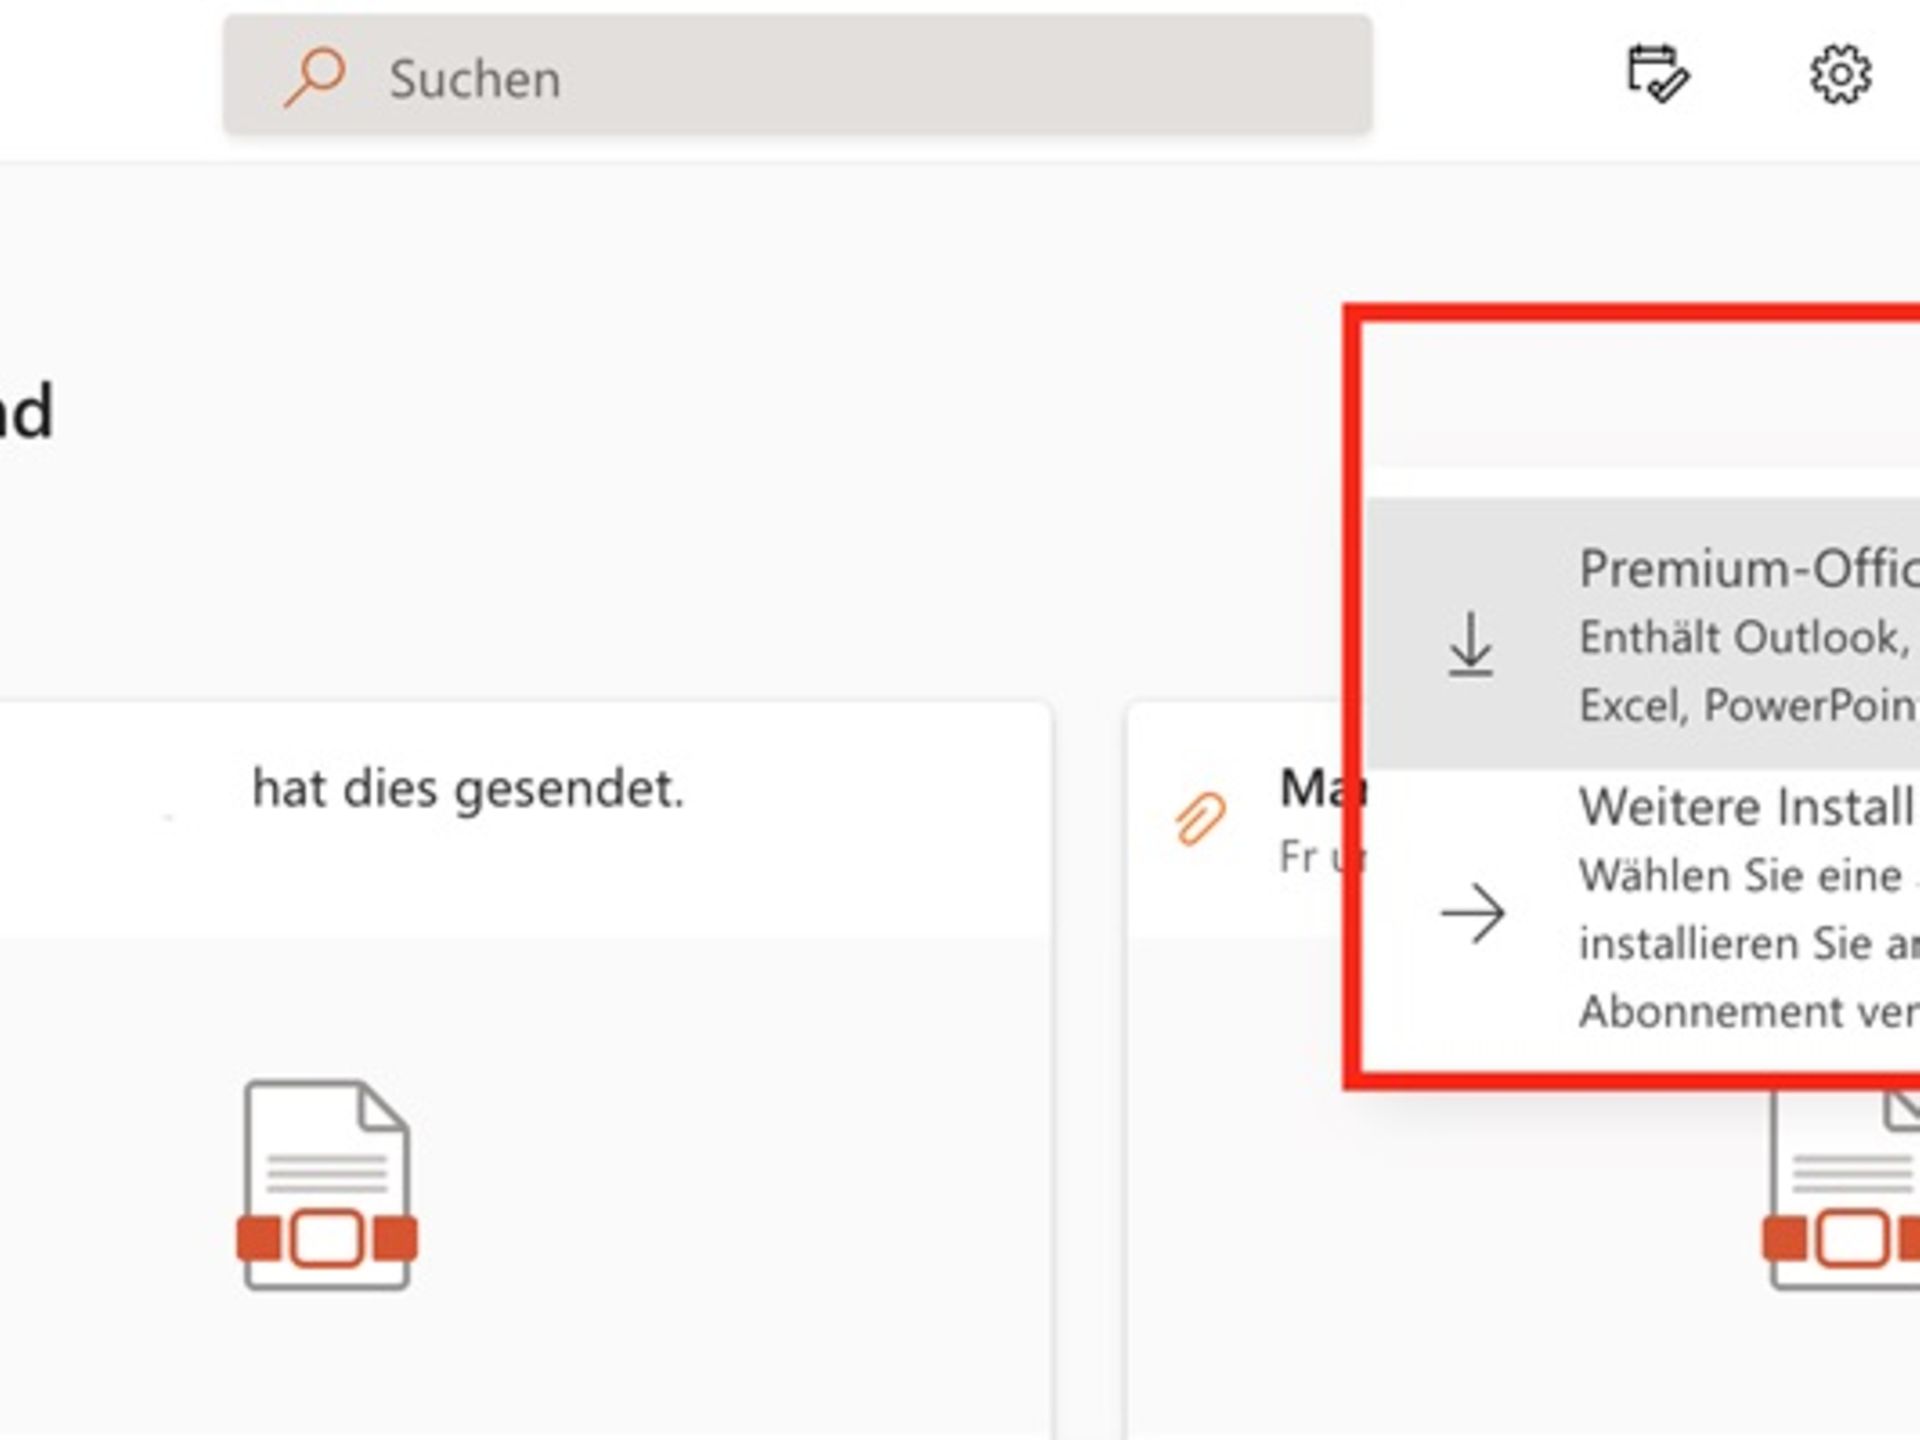
Depending on which Microsoft 365 or Office 365 user licence you have purchased, you can use the Office applications on up to 5 PCs or Macs per user.
To download and install the applications, log in to login page at Office.com with your account. Please note that this is the user account and not the admin account. You or the users are now on the Microsoft 365 or Office 365 home page. There, you can download the installation file directly by clicking on "Install Office".
For administrators, the Office Deployment Tool (Office Deployment Tool / ODT) is useful for administrators: they can use it to control the installation of Office applications on employees' computers, for example from a network computer, so that not every employee has to download and install the software themselves.
Deploy Microsoft 365 Apps as an administrator
The Office Deployment Tool (ODT) is a command-line tool that allows you to efficiently download and deploy Microsoft 365 apps to your client computers. It provides comprehensive control over the Office installation, including product and language selection, as well as control over updates and installation notifications.
Using the tool
For detailed information and instructions on how to use the tool, please refer to the relevant documentation from Microsoft.
Connecting an Office 365 or Microsoft 365 email account to Outlook (desktop) can be set up in just a few steps:
1. In the File tab in Outlook,
click Add Account. 2. Enter the email address of your Microsoft 365/Office 365 account and click Connect. 3
. When prompted, enter your password, then select OK > Finish to start using your email account in Outlook.
If you use Outlook on a Mac, the steps are similar:
1. In the Tools tab in Outlook, click on "
Accounts". 2. Click on the + sign and "New Account
". 3. Enter the email address
for the account. 4. Add the necessary account details and password, then click on "Add Account".
You can also set up your Microsoft 365 or Office 365 email accounts on a wide variety of mobile devices, such as Android mobile phones, iPhone devices or tablets. You can use either the Outlook version for the respective end device or any other email client.
Linking your email accounts varies slightly from email client to email client and from operating system to operating system. Basically, all you need is the email client, the relevant email address and the password.
Microsoft provides step-by-step instructions for individual devices and operating systems:
Shared mailboxes allow specific groups of people to easily monitor and send email messages from a shared account, such as public email addresses like info@meinefirma.com or kontakt@meinefirma.com. When someone in the group replies to a message sent to the shared mailbox, the shared mailbox appears as the sender, not the individual user.
Shared mailboxes are particularly useful for handling customer enquiries, as several people can take responsibility for monitoring and responding to emails. This ensures quick responses to customer enquiries and stores all relevant emails in a central mailbox.
To grant employees access to the shared mailbox, appropriate permissions (memberships) must be assigned. When automatic assignment is enabled, the shared mailbox will automatically appear in the Outlook app of authorised users after closing and restarting Outlook. Shared mailboxes do not require licences as long as the storage quota of 50 gigabytes is not exceeded. The steps required for setup are:
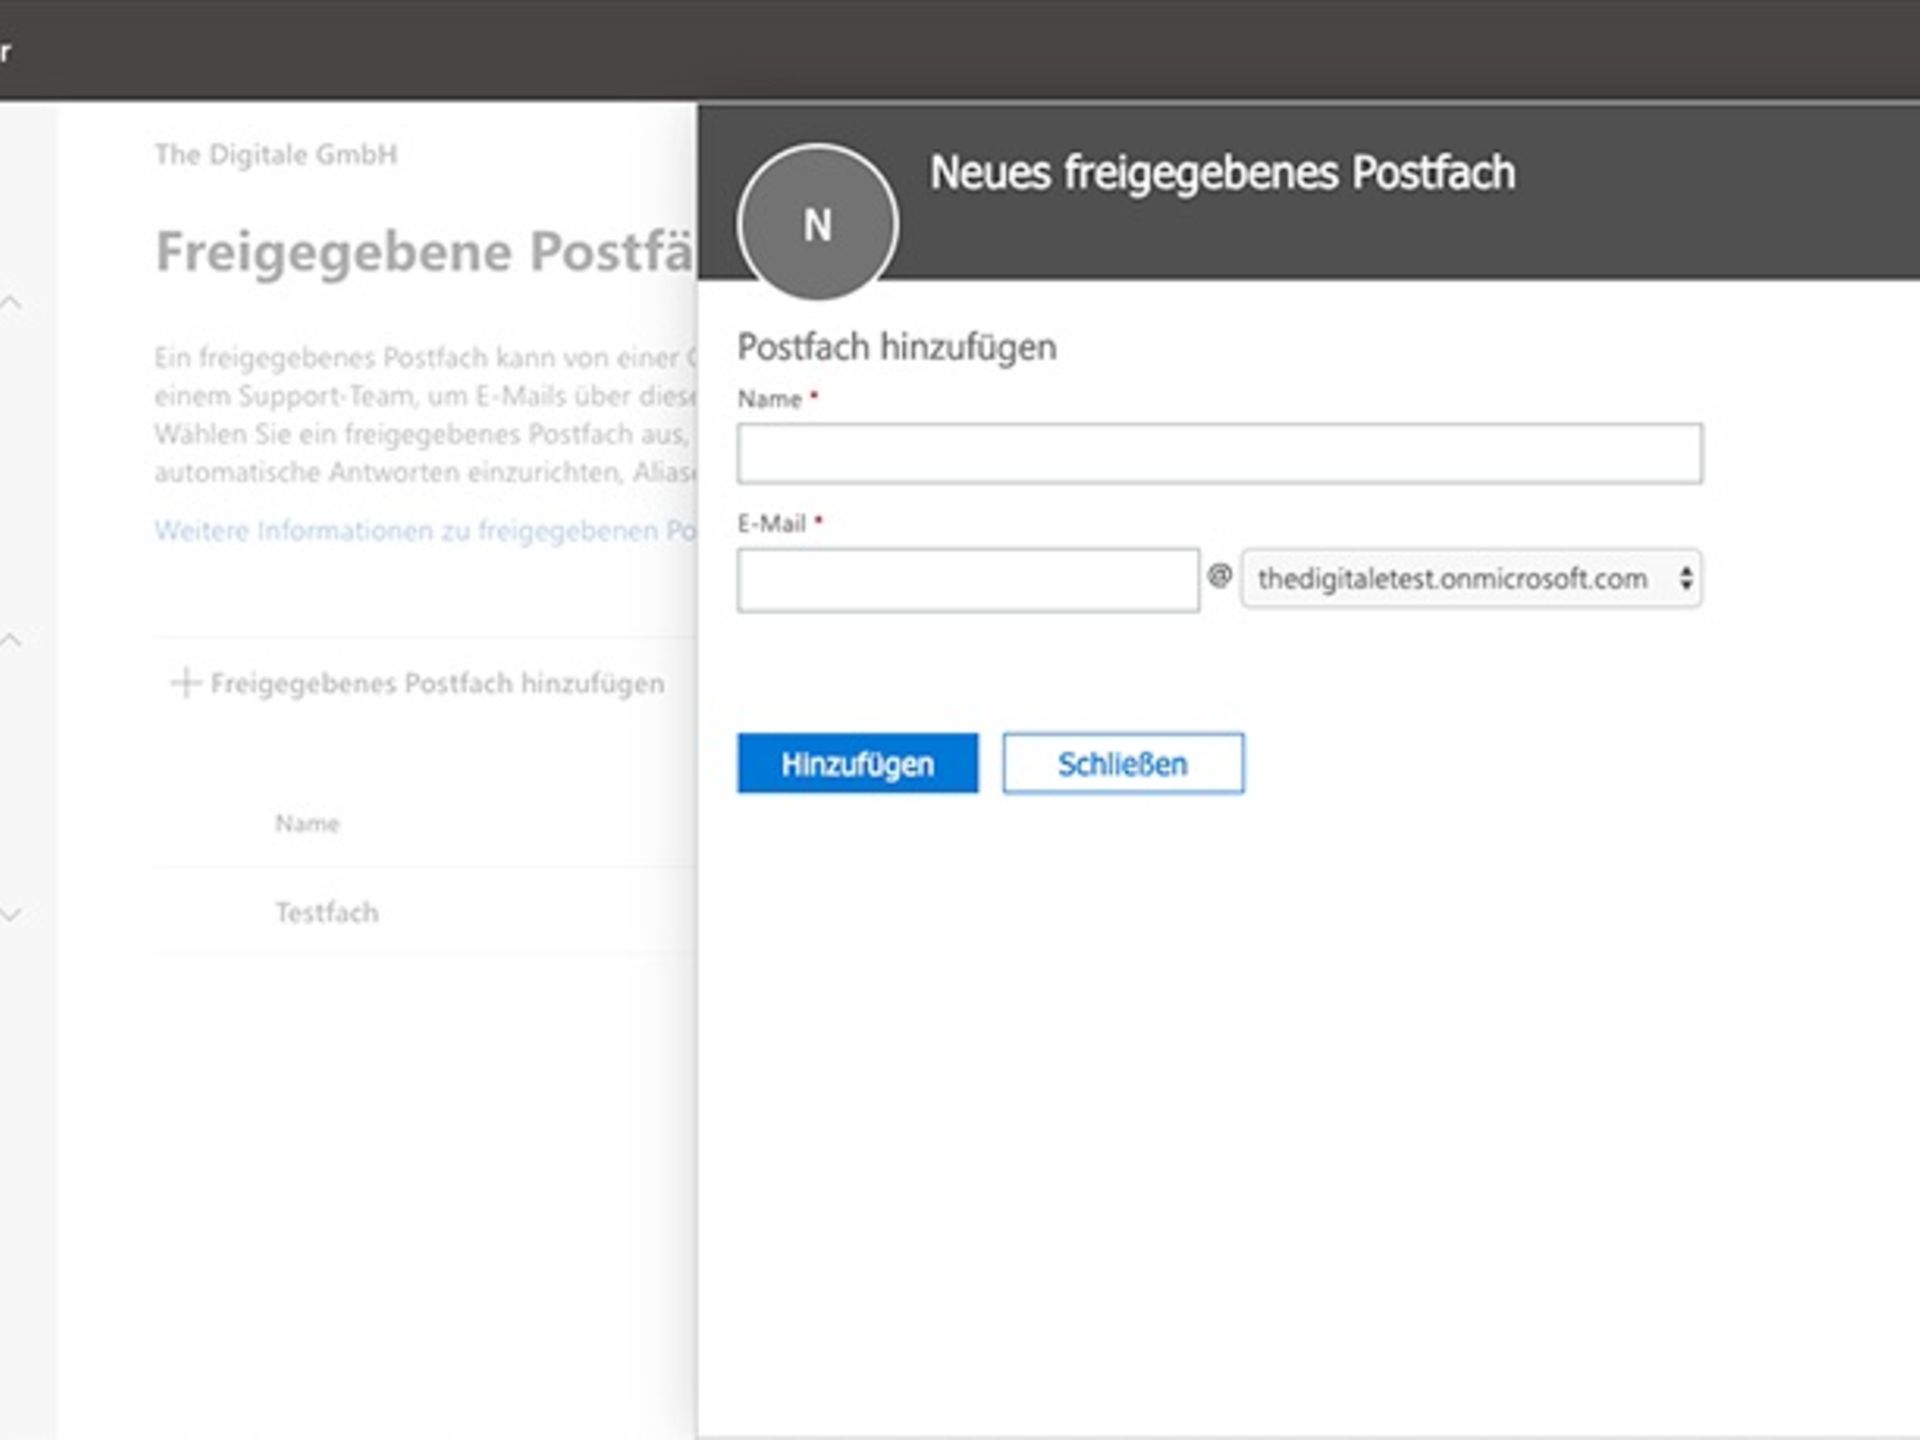
If you click on one of the shared mailboxes, you can add additional people who can then monitor it and send emails. To do this, click on "Edit" in the "Members" area. In the following dialogue box, you will find a search function that you can use to find and add people in your organisation. People who have been added can also be removed here.
Microsoft Teams, which is included in many Microsoft 365 editions, supports various forms of collaboration via a unified user interface: chats, teams and channels, meetings and conferences, and telephony solutions. You can choose the order in which you deploy the individual Teams workloads. However, we recommend starting with chats, teams and channels.
If you have already optimised your network for Microsoft 365 or Office 365, there is probably nothing standing in the way of introducing Microsoft Teams. In any case, you should check the following points:
Detailed instructions for implementing Microsoft Teams can be found in the small business documentation from Microsoft.
Getting started with Microsoft Teams on the client side is straightforward. Microsoft Teams can be installed on PCs, Macs and mobile devices or used via a web browser. After installing the Teams client, you or your employees simply need to log in with their username and password.
Desktop clients can be downloaded and installed directly by end users, provided they have the necessary local permissions. Administrative permissions are not required to install the Teams client on a Windows PC, but are required on a Mac.
IT departments can use their preferred method for distributing installation files to desktop computers in their organisation, such as Microsoft Endpoint Configuration Manager. Detailed information about the various features of the Teams client can be found in our user guide for Microsoft Teams.
The security of your infrastructure should be high on your to-do list. The Business and Enterprise packages from Microsoft 365 and Office 365 offer various functions for this purpose. The higher editions include an extended set of security features.
In its documentation, Microsoft recommends using some business basic security mechanisms. These include, among others:
Use Microsoft documentation to secure your Microsoft 365 tenant in the best possible way. Telekom experts are also happy to assist you with apps and security configuration of your Microsoft 365 environment.
Microsoft regularly updates the applications and services of Microsoft 365 and Office 365. Telekom and Microsoft offer various resources and options to help you stay up to date. The Microsoft Training Centre for Microsoft 365 provides comprehensive information, tips and a wide range of templates. The following resources are also worth checking out:
Nutzen Sie hier unsere weiteren Kontaktkanäle, um Ihr Anliegen zu lösen.
We are glad we could help!
Please feel free to use our contact channels at any time so that we can resolve your issue.